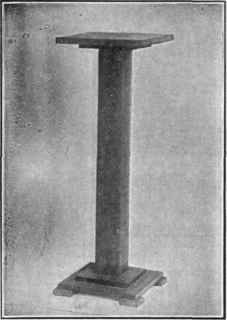
Jardiniere Stand
Description
This section is from the book "Shop Projects Based On Community Problems", by Myron G. Burton. Also available from Amazon: Shop Projects Based on Community Problems.
Jardiniere Stand
Materials
Oak (Chap. III., Par. 29), plain or quartered.
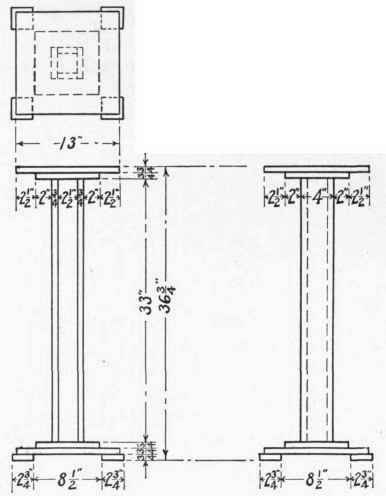
2 pcs. 7/8"x4 1/4"x35" S 2 S Uprights. 2 pcs. 7/8"x2 3/4"x35" S 2 S Uprights. 4 pcs. 7/8"x6 3/4"x14" S 2 S Sub. base and top. 4 pcs. 7/8"x3"x3" S 2 S Base blocks. 2 pcs. 7/8"x8 3/4"x9 1/2" S 2 S Base and sub top. 2 dozen 6d finishing nails. 16-1 1/4" No. 10 F. H. B. screws. 1 pc. 1/4"xl2" dowel rod.
Introductory Statement
This stand is intended to be used as a piece of room or porch furniture. It should therefore be constructed with great care, for its value depends very largely upon the neatness and beauty of its workmanship. It will serve as a suitable receptacle for a flower pot, vase or small piece of statuary.
In working out your design, you will find the straight line effects are most satisfactory; attempts at elaborate design or scroll effects are likely to have a cheap appearance. In designing any piece of cabinet work you should consider the style of furniture of the room in which it is to be used.
References:
The Wood Finisher, Maire.
The Up-to-Date Hardwood Finisher, Hodgson. Fredrick Drake Co., Chicago.
Woodworking for Schools on Scientific Lines, Bailey and Pollitt. Manual Arts Press, Peoria, 111.
Jardiniere Stamp
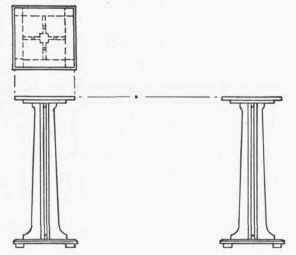
Suggestions For Original Design
Jardiniere Stand Specifications
The Base And Sub-Base
As this sub-base calls for a very wide board, it will be necessary for you to join two boards with dowels. Cut the sub-base the exact size shown in the drawing, and make sure all the edges are perfectly straight and square.
Where the end grain of wood is exposed in cabinet work, it should be very carefully finished. Do this with the block plane and finish with fine sandpaper. The small corner blocks under the sub-base must be perfectly straight and project evenly on all sides.
Prepare the base; it may also be necessary to glue up this piece. Be sure it is perfectly square when finished.
The Upright
The upright is to be a boxed column, made up of four boards glued together. The edges must be perfectly straight and square, so the joints may be perfect. Note: It would be a very excellent plan to join these corners with miter joints, if you are skillful and patient enough to do it well. Fasten the column together with glue (small finishing nails may be added, if necessary).
The Top And Sub-Top
The top is to be made up of two pieces joined with dowels. Be sure this piece is perfectly square when completed.
Finishing
When the work is completely assembled, with a sharp steel scraper smooth all surfaces perfectly. With a fine-pointed nail set, set the nails slightly below the surface. Note: These holes may be filled with putty made the same color as the stain you expect to use, or with a little glue and wood dust made by the sandpapering. Sandpaper carefully; as this is a straight line design, it would not be in harmony with itself if any of the corners were rounded or marred in any way. Stain it the desired color. It should be given a coat of filler, and finished with shellac, or varnish. Note: This will be an excellent piece of work on which to practice the rub varnish finish, because all its surfaces are broad and flat, and there are no complicated parts to offer unsual difficulties.
Optional and Home Projects Employing Similar Principles.
Pedestal
1. The general idea for the construction of a pedestal, as shown in the Suggestion, is a very popular one. It admits of a great many variations in design. As a rule the graceful straight line effects will be found most pleasing in elementary work.
Hall Tree
2. The principle of constructing a base to support a tall, slender upright is employed in making a hall tree. As a rule the central upright is a solid piece of material from 1 1/2" to 2 1/2" square. The box construction of upright, as shown in this lesson, may be used if desired.
Continue to:
My Books

