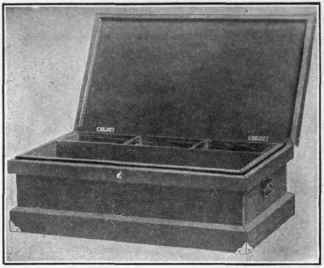
Tool Chest
Description
This section is from the book "Shop Projects Based On Community Problems", by Myron G. Burton. Also available from Amazon: Shop Projects Based on Community Problems.
Tool Chest
Materials
Redwood (Chap. III., Par.
49) or any soft wood.
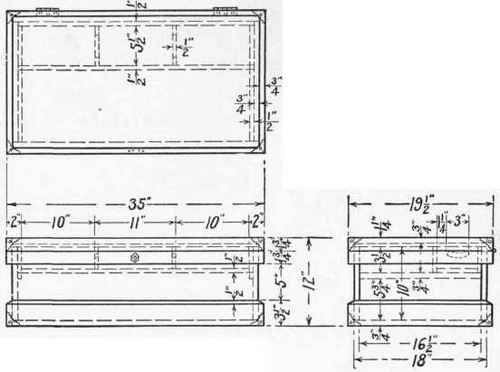
4 pcs. 7/8"x 9 1/2"x35" S 2 S
Top and bottom. 2 pes. 7/8"xl0 1/4"x35" S 2 S
Sides. 2 pes. 7/8"xl0 1/4"xl8" S 2 S
Ends. 2 pcs. 7/8"x 4"x36" Bottom trim. 2 pes. 7/8"x4"x21" Bottom trim. 4 pes. 7/8"x2"x36" Lid and top trim. 4 pes. 7/8"x2"x21" Lid and top trim.
2 pes. 1/2"x3/4"x17" Till support.
1 pc. 1/2"x 5 3/4"x32" Till bottom.
3 pes. 1/2"x3 3/4"x32" Till sides, ends and partitions.
1 pair hinges, with screws. 8 chest corners, with screws. 1 pair handles.
1 mortise lock.
4 doz. l 1/2" brads.
Introductory Statement
A good strong box is necessary in moving tools from one place to another; for convenience such a box should be fitted with handles. For this purpose there is nothing better than the old-fashioned tool chest. It will also furnish an excellent place to store extra tools which are not in every day use.
The tool box given in this lesson is built on the plan which for many years has been recognized as the standard tool chest design. There are a great many different styles of handy tool chests prepared particularly for different kinds of tools; you will find it interesting to work out a plan which will be fitted to your need.
References:
Saws in the Filing Room. Atkins Saw Co., Indianapolis, Ind. How to Sharpen Tools. Pike Manufacturing Co., Pike, N. H. The Story of Carborundum as a Sharpening Material. Carborundum
Co., Niagara Falls. Carpentry, Townsend. American School of Correspondence, Chicago, Ill,
Tool Chest
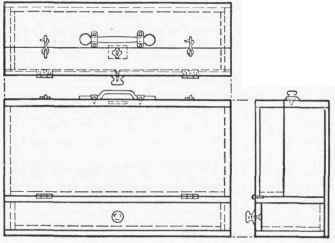
Suggestions For Original Design
Handy Tool Cabinet
Methods or Fastening corners
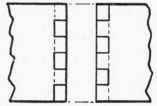
No. 1
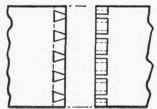
No.2
Tool Chest Specifications
The Sides
Square the stock; lay out, and make the sides the dimensions shown in the drawing. Be sure these sides are exactly the same width and length. They must also be perfectly square on all corners, or your box will not be square when assembled.
The Ends
Square the stock; lay out, and make the ends the exact size shown in the drawing. Be sure these ends are exactly square and the same size.
The Bottom
It will be necessary to make the bottom out of two or more pieces. These pieces should be joined with a tongue and groove joint made with the matching plane, or they may be joined with dowels if you prefer this method.
Continue to:
My Books

