


Lesson XIII. Hand-Screw And Screw-Driver
Description
This section is from the book "Elementary Woodwork", by George B. Kilbon. Also available from Amazon: Elementary woodwork.
Lesson XIII. Hand-Screw And Screw-Driver
Problem I. Adjusting The Hand-Screw
The use of the hand-screw is to hold work in place on the bench, or to hold two pieces firmly together while glue is drying. It is necessary to keep the jaws constantly parallel, else inconvenience will result in adjusting, or injury in clamping. If through inadvertence the parallelism of the jaws is disturbed, one of the screws must be turned independently of the other, sufficient to correct it. Fig. 159 shows a hand screw correctly adjusted, that is, with its jaws parallel.
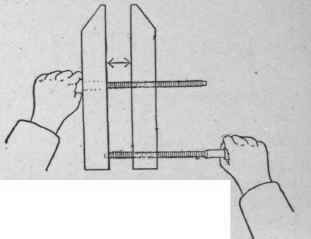
Fig. 159.
Set the hand-screw so that the distance between the jaws near the inner screw (see arrow-heads, Fig. 159) shall measure a given amount, as 2 in. Next set it to some other given amount, as 4 in. To do this, grasp the outer screw with the right hand, and the inner screw with the left. Do not let either screw slip in the hand. Revolve the hand-screw, causing the upper portion to move from you and the lower portion toward you, till you judge the jaws to be 4 in. apart, then lay the tool on the bench and measure it. If the measurement is near 4 in., make it exactly so by turning the inner screw without raising the tool from the bench, but be sure to turn the outer screw at the same time, so as to keep the jaws parallel. Next, set the hand-screw to 3 in., which will necessitate revolving in the opposite direction.
In this manner practise the class in setting the hand screw to various measurements.
Problem II. Clamping-Work
Take two blocks 4 in. X 2 in. X 7/8 in. Place them with their sides together, and set the clamps to hold them lightly, as in Fig. 160.
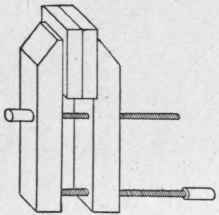
Fig. 160.
Next, tighten the grip by a hard turn of the outer screw.
Loosen the grip by first loosening the outer screw. Place the blocks with their edges together, as in Fig. 161, and clamp them in that position.
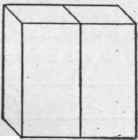
Fig. 161.
Loosen again, and place the blocks with their ends together, as in Fig. 162, and clamp them.
Place the blocks with the edge of one to a side of the other, as in Fig. 163 and clamp them.
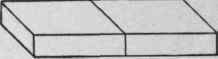
Fig. 102.
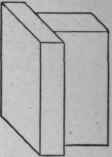
Fig. 163.
Place them with the end of one to the side of the other, as in Fig. 164 and clamp them.
Place them with the end of one to the edge of the other, as in Fig. 165 and clamp them.
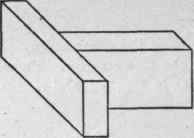
Fig. 164.
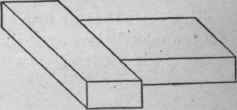
Fig. 165.
Problem III. Screw-Driving
Take any two waste pieces of 7/8 in. pine, 8 in. X 2 in. will answer. On the piece to be used for the upper board place several points in a zig-zag line, as in Fig. 166, about 1/2 in. from each edge, the points nearest the ends being about 1 in. therefrom.
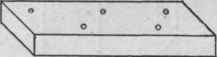
Fig. 166.
Hold the board in the vise. Use the 7/32 in. drill-bit, and bore holes entirely through it. No holes are needed in the under board, unless the screw is so near an end or edge as to be liable to split the wood, since screws will turn into soft pine on account of their gimlet points.
Insert a 1 1/2 in. No. 11 screw in each hole, and, placing the boards together, turn down each screw till its head begins to touch the wood, then press hard on the driver, turn one-half a revolution, and release. The object of this pressure is to force the screw into the wood, and the release after each semi-revolution is to prevent the driver from slipping out of the head of the screw. Keep repeating this process till the screw is forced into the wood with its top flush, or even, with the surface of the wood, as in Fig. 167. It will be noticed that we did not countersink the upper board for screw-heads, as they will force into soft pine without it.

Fig. 167.
In driving No. 11 screws into hard wood it is necessary to bore with the 5/32 in. drill-bit into the under piece, and to countersink the upper. It is also well to put tallow on the screw when about to turn it into hard wood.
To recapitulate: A screw requires a hole slightly larger than itself through the first board, no hole in the second, if soft wood, unless too near the end or edge, but a hole in the second board, if it be hard wood, just large enough to prevent the screw from being broken by the force required to drive it. Also the upper board if hard wood needs to be countersunk for the screw-head, while if soft wood it does not.
Continue to:


My Books

