


Projects For The Children. Continued
Description
This section is from the book "Do It Yourself With Aluminum. 125 Projects For The Home Craftsman", by G. W. Birdsall. Also available from Amazon: Do It Yourself With Aluminum.
Projects For The Children. Continued
Play Tent (Fig. 14-5) will give the youngsters no end of fun. Dimensions suggested, of course, may be enlarged easily if desired to make room for beds. Use 11/4" tube for the four 6' main members, 94" tube for the three 36" spacers at ground level. Bolt one end of each spacer directly to the bottom of a main frame member, but use an extra nut on the bolt between the two tubes so that some play can be left in the joint to permit folding up the connection without loosening the bolt. See the inset of Fig. 14-5.
At the other end of each spacer, flatten out a 2" section and saw a notch in it to latch over a bolt extended out from the 11/4" tube to which it is connected as shown by Fig. 14—5. This then allows the entire frame to be folded up without removing or loosening any bolts.
The top end of each of the four main frame members is flattened by squeezing in a vise, then riveted to a 31/2" or 4" hinge. Now get Mother to help in cutting and fitting a heavy canvas covering to the frame. Sew straps to the bottom edge of covering and to the door opening to tie around frame members.
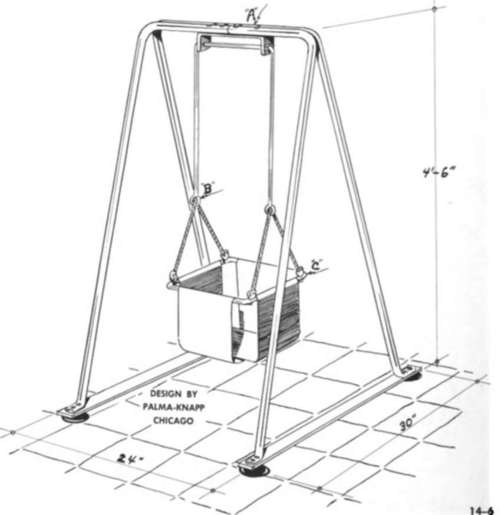
Child's Swing (Fig. 14-6) is a handy place for the baby, as it can be moved about the house easily to be in sight of Mother. Baby will enjoy it, too. Main A-frames are four 6' lengths of tube, flattened at the bottom end for riveting to a 32" length of 1/4" x 1" bar forming the bottom stretcher on each side. Attach rubber suction cups as shown to keep swing from "walking" when in use. Bending off a 12" piece at the top end of each leg gives a height of ahout 54". See Fig. 3-27 and accompanying instructions for tube bending.

Fig. 14-7.
Join legs by bolting to the U-shaped piece of x 1" bar stock at "A" which is 12" across top, 2" down each side. It has 3/8" holes for the swing rod which is turned up at "B" for the short lengths of cord or chain supporting the seat. Frame for seat is 3/8" rod formed to a 12" square, ends halved and riveted per Fig. 4-22. Cover with canvas as shown. Attach large screw eyes to frame by drilling, screwing through, and upsetting on opposite side to lock securely.
Child's Wheelbarrow (Fig. 14-7) will supply the youngster with many an opportunity to help Dad outdoors. Suggested dimensions may be reduced to 14" high, 18" long, 14" wide if desired. Bottom of box section is 94" plywood; sides and ends are 1/4" plywood. Corner angles are 1/16" x 1" x 1". The 94" tube for the handles is flattened at the front end for the wheel connection. A U-shaped bracket of 1/4" x 1" bar bolted to the two tubes just back of the wheel supports front end of box. Tubes then extend on back to the V-bend forming the back legs, back up to the box and then to the handles. Bolt tube to bottom of box at top of V-bend. Attach rubber bicycle grips to form handles as shown. See Fig. 3-27 and accompanying instructions for tube bending.
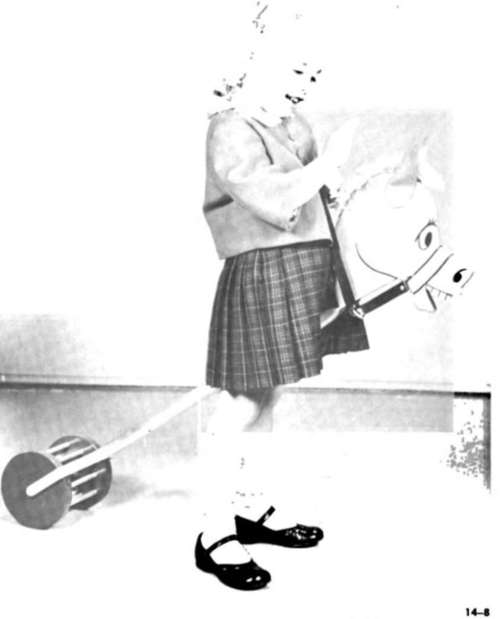
Jolly Horse (Fig. 14-8) uses 30" length of 94" tube for main member. Flatten rear end and bolt to it a U-shaped piece of 1/8" x 94" bar formed to go around the cylinder. This is made from two 6" diameter circles of 94" plywood with ten 8" lengths of 3/8" rod fitted into holes on a circle 3/4" inside edge of wood end pieces. Drill these 3/8" holes just 1/2" deep. Drive all ten rods into one end piece, then insert two or three small sleigh bells and drive other end piece onto the rods. Attach U-bar to cylinder with round-head wood screws into center of wood ends. Avoid setting screws so tightly that cylinder cannot turn easily.
Cut out horse head from 3/4" plywood, carefully rounding all edges, smoothing entire surface, and painting as shown. Flatten upper end of tube member and screw to underside of horse head. A small bright red strap will finish it off.
Tinkle Wheelbarrow (Fig. 14-9) uses same cylinder with bells in it as described above (Fig. 14-8). Wheelbarrow itself uses two 30" lengths of 1/8 x 3/4" x 3/4" angle for main members which extend from cylinder, under body of barrow and back to form the two handles. The legs are 20" lengths of 1/8" x 3/4" bar formed to a V of 8" on a side with bottom 1" wide and 11/2" flanged on each end for riveting to the main members.
Make pan from one piece of plain sheet, following box design explained in Fig. 3-7. Here, of course, box is not square. End toward handles is only 1" high, 14" wide. Opposite end is 3" high, 11" wide at bottom, 12" wide at top. Sides slant to join ends. Turn over a 1/2" flange on all top edges and carefully smooth all corners and sheet edges. Front corners are locked with 1/2" flange on side members overlapping front end and riveted per Fig. 4-7.
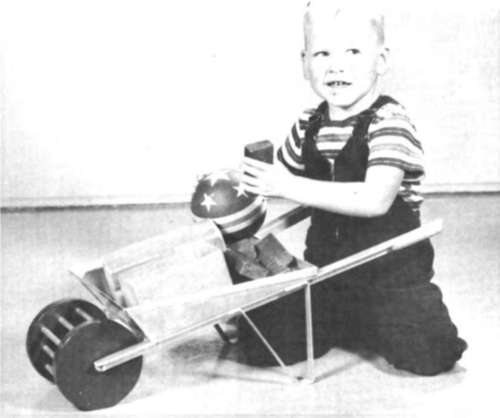
Fig. 14-9.
Fig. 14-10.

Tricycle Lift (Fig. 14-10) will fascinate many a youngster with its possibilities. Here it is used for pulling a wagon. It will also lift and carry boxes, baskets, and other packages. Main member is 3' length of 11/4" tube, flattened at bottom end and bolted to rear foot stand or around rear axle. Side braces are 32" lengths of 94" tube, flattened at top for bolting to main member. Bottom ends are also flattened and drilled to take axle. Wheels are removed, these members placed over axle and wheels replaced.
Top brace is 30" length of 94" tube, flattened at top for bolting to main member and flattened at bottom for bolting to seat post. Attach a small galvanized pulley to upper end of main frame with a "U" member made from 1/8" x 3/4" bar stock as shown. Thread a piece of clothesline through it and your young teamster is ready for action.
Continue to:


My Books

