


Chapter 14. Projects For The Children
Description
This section is from the book "Do It Yourself With Aluminum. 125 Projects For The Home Craftsman", by G. W. Birdsall. Also available from Amazon: Do It Yourself With Aluminum.
Chapter 14. Projects For The Children
Child's Table and Chair Set (Fig. 14-1) will greatly enhance any child's room and provide an excellent work and play center. For the table, cut out and screw or nail together two pieces of 3/4" plywood 24" x 30". Pine Nov-A-Ply makes a beautiful surface pattern and is recommended for the top piece. In each corner, drill 1" diameter holes for the legs 2" in from each edge of the table top, drilling vertically into underside of table to a depth of
Inlay edge of table with 1/16" x 1" x 1" angle per Fig. 4-50. Apply in two pieces, each extending full length of one side and half the width of the table at each end (541/4"). File one end of each piece smooth and square. Make corner bends as directed in Fig. 4-37, starting the first 121/8" in from the end just prepared. Fit length between bends per instructions in Chap. 4. Proceed to attach first piece of angle to table.
Then cut and fit other piece. After bending, trim ends to make exact fit with first piece of inlay already in place.
Cut four 21" legs for the table from 1" tube. Smooth off one end of each leg, and insert per instructions with Fig. 4-57. Place on flat surface, and trim longest leg so that table sets evenly. Close open ends of legs with snap-in end fittings.
For the chair, cut and nail or screw together two pieces of 3/4" plywood 12" x 14". Place this seat upside down, and mark hole centers 11/4" in from each edge.
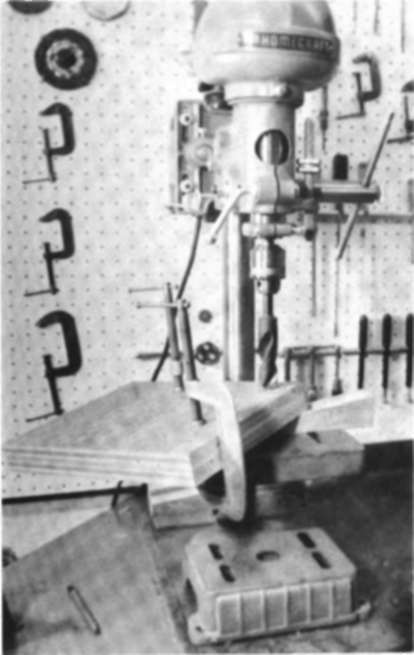
Fig. 14-2.
Notice that chair legs are at an angle, not vertical, for hest footing and appearance (10° is used here). The hack leg9 extend straight backward. The front legs do not extend straight forward or straight out sidewise but out 45° cornerwise, as shown in Fig. 14-3.
Since back legs extend through seat to form a frame for seat back, drill these holes clear through the seat, using the 10° wedge when clamping to lied of drill press. To get a little clearance for easy insertion of the tube, wobble the rotating drill in the hole slightly or run it through several times to enlarge the hole slightly.
For front legs, clamp seat on bed of drill press as shown in Fig. 14-2, using the 10° wedge to get the angle desired. Set drill stop for a depth of 13/8".
Cut front legs 121/2" long from 1" tube. Insert the same way as table legs. Lock in position with finishing nails 21/2" long driven in from edge of seat. Drill clearance holes slightly smaller than nail shank and just 11/2" deep to assure penetrating the tube wall. Drive the nail which will pierce far wall of tube and pass on into wood, securely locking tube. Put four nails into each leg, one near the center of each piece of plywood in the seat, from each edge.

Fig. 14-3.
Cut back legs 261/2" long from 1" tube. At a point 14" from one end, make a 221/2° bend on a 9" radius, per instructions in Fig. 3-27. Insert these legs through seat, putting the 14" end through from the top side. Lubricate with wax or old candle. If hole has not sufficient clearance to permit insertion, wobble drill in hole as suggested above. Position legs so they extend through seat the same distance as front legs. Turn tubes in seat so that bent portion extends straight backward. Then lock each back leg to seat with four nails as previously described.
Upholster the seat with a layer of cotton batting, covered with plastic sheet material, folded and tacked under the seat at front, back, and both sides. Holes are cut to fit the back seat frame.
Use any heavy fabric material for the seat back. First sew a narrow hem at top and bottom (about 10" in height). Then sew a wide hem on each end, big enough to slip over the frame formed by the extension of the back legs. Close top end of this hem so tube end will not come through. Fit so seat back is tight when slipped over the tube.
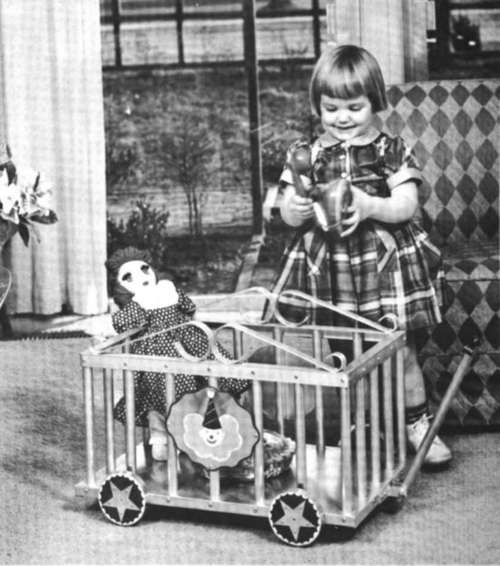
Fig. 14-4.
"Circus Wagon" Toy Cart (Fig. 14-4) uses a 23" x 14" piece of 3/4" plywood for the base. Cover with plain aluminum sheet 16" x 25" by notching corners and turning around and under base. Tack all around under base with 1/2" flat-headed tacks about 1" apart. Mark a line 15/16" in from edge all around top of base . . . . the center line for the post holes. From intersection of lines at corner to first hole center on side is 39/16". All other holes are then 31/2" apart down the side. On ends, the first hole is 3 1/16" from corner intersection; the others, 3" apart. After marking hole centers, drill 3/4" holes through aluminum and 1/2" into plywood with an ordinary brace and bit, per Fig. 2-17.
Top rail is 1/16" x 1" x 1" angle 70" long. Drill a ;hole for bending corners at 22" from one end, another at 35", a third at 57". Notch and bend per Fig. 4-37. Mark tube locations the same as base. Cut 20 pieces of 3/4" tube exactly 105/8" long. Insert tubes in base, drill holes from edge of base toward the center 14-5 of each tube, and drive a #8 x 3/4" self-tapping screw. Drill 1/8" holes through top rail into top of tubes, and insert #6 x 1/2" self-tapping screws.
For top curls, bend (per Fig. 3-18) four 18" lengths of 1/8" x 94" bar to a radius on one end, 13/8" radius on other; attach to top rail with bolts. Tongue is a 15" length of 3/4" tube set between a pair of angles cut from 3/4" bar, 13/4" on a side. Put four 2" furniture casters on underside of base. Make four 4" diameter wheels of 3/4" plywood. Attach wheel rims of 3/4" strips of plain sheet. Paint star and scallops on wheels. Paint and cut out clown design (or any other design desired) on sides from plain sheet. Attach to tubes with self-tapping screws.
Continue to:


My Books

