How To Make Leather Purses
Description
This section is from the book "Cassell's Cyclopaedia Of Mechanics", by Paul N. Hasluck. Also available from Amazon: Cassell's Cyclopaedia Of Mechanics.
How To Make Leather Purses
To make the purse illustrated by Fig. 1, first cut a cardboard pattern, and mark and cut out the leather for the back piece A (Fig. 2), which is on a smaller scale to Fig. 1. B (Fig. 2) is the front piece. A slit or small hole H (Fig. 1) is made in the front piece, and a collar-stud is inserted, or a button may be sewn to the leather. The back and front pieces are then sewn together round the edges, the flesh sides being innermost. The dotted lines D (Fig. 1) represent the stitches. The edges of the purse should be rubbed smooth, and a slit S (Fig. 1) made in the flap to fasten on the stud or button. Instead of a stud or button to fasten the flap of the purse, a piece of leather L (Fig. 3) can be sewn on, under which the flap F (Fig. 3) is pushed. Leather divisions can be added to these purses if desired. Fig. 4 shows a different shape of purse. To make a purse that opens wide, a piece of thin leather, Fig. 5, is sewn to the sides and bottom.
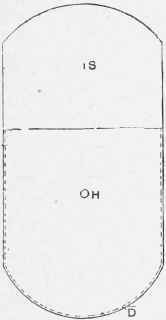
Fig. I.
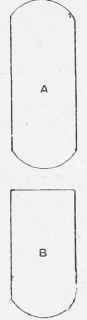
Fig. 2.
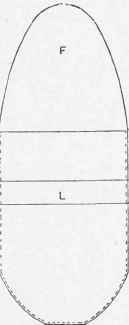
Fig. 3.
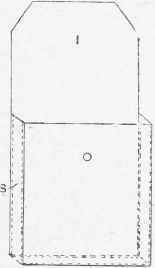
Fig. 4.
Fig. 5. How To Make Leather Purses.
Continue to:
My Books

