


Lesson IX. Use Of Bit And Brad-Awl. Continued
Description
This section is from the book "Elementary Woodwork", by George B. Kilbon. Also available from Amazon: Elementary woodwork.
Lesson IX. Use Of Bit And Brad-Awl. Continued
Problem. II Boring With The Grain
Take another of the boards planed in the last two lessons, cut it 5 1/2 in. long, gauge midway of the thickness on each edge and end, and gauge at successive 11/16 in. from the tried edge (See Fig. 105, Lesson VIII (Edge And End Planing). for definition of tried edge), on each side and end, as in Fig. 119.
Place the work in the vise with an end uppermost. It should stand exactly vertical, with one-half of it buried in the vise. Bore as directed in Figs. 117 and 118 till one-half of the spiral portion of the bit is buried in the wood, as in Fig. 120, when the bit should be withdrawn to clean out the boring-chips from the hole. Use the same precaution in withdrawing as directed in Problem I.

Fig. 119.

Fig. 120.

Fig. 121.
Insert the bit in the hole, and bore till the spiral is all buried, as in Fig. 121, then withdraw as before.
Insert the bit in the hole, and bore an inch deeper and withdraw, and so continue till the bit comes through at the lower end.
These directions concerning cleaning out chips must be observed or the bit will be either broken or bent. If they are observed, it need never be injured.
Mark 10 off from 100 for every hole that comes out 1/4 in. from its proper intersection.
Problem. III. Boring From Both Ends
Take one of the boards planed in last lesson, gauge it as in Problem II., and bore it as in that problem about 5 in. deep. Invert it in the vise, and bore from the other end till the holes meet midway.
Mark 10 off from 100 for every hole which you cannot see through.
Problem IV. Use Of Drill-Bit
Take one of the boards planed in the last two lessons, make it 2 in. wide, gauge and square as in Problem I., and bore holes as in that problem, using the 5/32 in. drill-bit. At first this bit will need no downward pressure beyond the weight of the bit-stock; but when the point of the bit has descended half an inch in the wood it will be necessary to hold back on it, or it will descend faster than it can cut, and the result will be a small rough hole, and perhaps a broken bit. Note this also and remember it.
Problem V. Use Of Brad-Awl
Take another of the boards planed in the last two lessons or a similar one; gauge on both sides at every 11/16 in., and square around at 5/8 in. from one end, and then at every 3/4 in., as in Fig. 122.
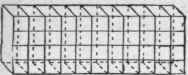
Fig. 122.
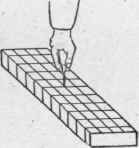
Fig. 123.
With medium-sized awl bore from the intersection of lines on one side of the board a little more than half way through, as in Fig. 123, then turn the board over and bore from the intersection on the other side to meet the first bored holes, sighting from two directions at right angles to each other, as in boring with the auger bit, in order to insure a vertical hole.
Mark 2 off from 100 for every hole which you cannot see through.
Continue to:


My Books

