Wash Bench
Description
This section is from the book "Shop Projects Based On Community Problems", by Myron G. Burton. Also available from Amazon: Shop Projects Based on Community Problems.
Wash Bench
Materials
Cypress (Chap. III., Par.
46) or any soft wood.
lpc. 7/8"x13 l/2"x35 1/2" S2S
Top. 2 pcs. 7/8"x11 3/4"x18 1/2" S2S
Legs. 2 pcs. 7/8"x4"x34" S2S
Skirt boards. 2 1/2 doz. 8d finishing nails.
Introductory Statement
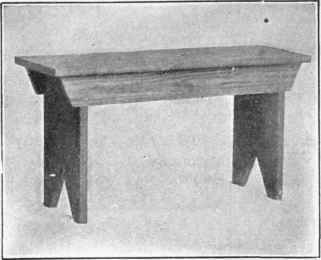
Although washing machines are quite generally used, the washtub has a place in home laundry work, and for that reason it is necessary to provide some sort of bench for it.
The wash bench shown in this lesson is a convenient size to accommodate one tub and leave some room at the side for other purposes. The slot in the top of the bench is to serve as a hand hold, enabling one to move it from place to place with the use of one hand. The height of the bench is largely a matter of choice with the person who is to use it. The general plan of this bench is the same as should be used in constructing a substantial bench for other purposes. The length, height and width can be changed to suit the purpose for which the bench is intended.
References:
U. S. Bulletin No. 607, The Farm Kitchen As a Workshop.
With the Men Who Do Things, A. Russel Bond.
U. S. Bureau of Forestry, Bulletins No. 22, 30, 36.
The Story of Lumber, Bassett. The Penn Pub. Co., Philadelphia.
Wash Bench

Suggestions For Original Design
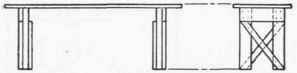
No.1
Strong Bench for Outside Use
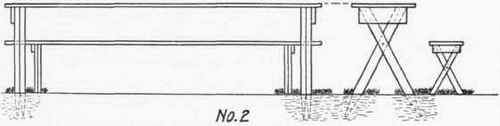
Camp or Picnic Table with Bench Less Driven into the Ground
Wash Bench Specifications
The Legs
As this material is furnished S 2 S, it will not be necessary to resurface it. Select the best side for the working face (Chapter II., Paragraph 2). Prepare a working edge (Chapter II., Paragraph 4). Prepare a working end (Chapter II., Paragraph 5). Layout the shape and dimension of one of the legs as given in the drawing. Carefully" cut this leg to these lines. Be sure that all edges are planed perfectly straight and square. In like manner lay out, and make the second leg. Do not cut the gains in the top ends of the legs to receive the skirt board until after the skirt board has been prepared.
The Skirt Board
Square the stock for the skirt board (Chapter II., Paragraphs 1, 2, 3 and 4). Lay out and cut the skirt board the desired shape and dimension as given in the drawing. In like manner prepare the second skirt board. Notice that the gains in the top ends of the legs are to be cut just wide enough and deep enough to receive the skirt board.
You may lay out these gains, making them just that size. The depth of the gains may be laid out with the marking gauge by setting it to the thickness of the skirt board. Saw out these gains, using the back saw to saw down to the gauge line, and the rip saw to rip them down. Prepare all four gains in the same manner.
Continue to:
My Books

