Hand Mirror
Description
This section is from the book "Shop Projects Based On Community Problems", by Myron G. Burton. Also available from Amazon: Shop Projects Based on Community Problems.
Hand Mirror
Materials
Mahogany (Chap. III., Par. 50),
Walnut (Chap. III., Par. 44),
Cherry (Chap. III., Par. 34),
Gum (Chap. III., Par. 37).
1 pc. 3/4"x6 1/4"x11" S 2 S 1-5" D bevel plate mirror. 1 pc. rattan 1/8"xl6".
Introductory Statement
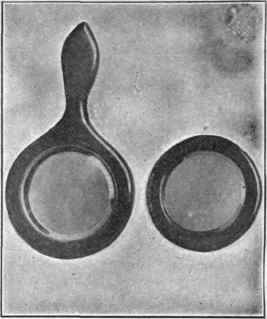
A small mirror is a convenient article for the dressing table or the traveling bag. While there are innumerable kinds of hand mirrors on the market, yet a hand-made one will be very much appreciated because of its special personal interest.
This mirror should be made from one of the finer cabinet woods, such as mahogany, gum, cherry or walnut. It must be carefully executed so as to be free from all tool marks and must have a fine finish or it will not be appropriate for the purpose intended. This piece of work well done will make an especially attractive gift.
References:
Glass Manufacture, Walter Rosenhain. D. Van Nostand Co.
The Making of Plate Glass, Pittsburgh Plate Glass Co., Pittsburgh, Pa.
A Visit to a Glass Factory, How the World Is Housed, Carpenter. American Book Co.
Silvering Glass, C. C. Baly. Scientific Am. Sup., January 11, 1908.
Mirrors, Young Folks' Cyclopedia of Common Things, Champlin. Henry Holt & Co.
Materials Used in Silvering Glass. Scientific Am. Sup., February 11, 1905.
Hand Mirror
Suggestions For Original Design
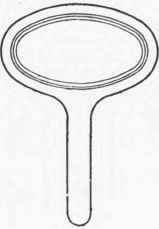
No. 1
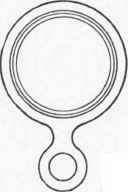
No. 2
No. 3
Hand Mirror Specifications
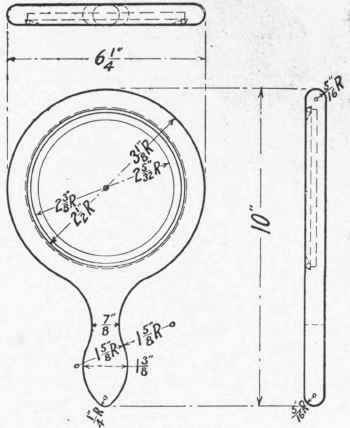
Since this piece of material must be completely surfaced as one of the last operations, it will not be necessary to resurface it now. Prepare a working edge (Chapter II., Paragraph 4) and a working end (Chapter II., Paragraph 5). Make all measurements from the working edge and working end, and lay out the entire shape of the mirror.
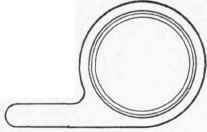
With your compasses lay out the opening which is to be cut to receive the mirror plate. (It would be well to measure the mirror which you are to use to make sure that it is exactly the size shown in the drawing). This opening for the mirror plate should be cut as the first operation. If you have an expansive bit, this hole can be easily cut with it. If you do not have one, lay out the circle very carefully with the compasses, and with a sharp-pointed knife trace this compass mark, cutting it as deeply as you can conveniently; then with a sharp chisel cut away the wood in the central part up to this line. This will have to be done with extreme care, or you will chip out the edge beyond the compass line and completely spoil the appearance of the work. Continue cutting this compass line deeper and deeper as you cut away the material in the central part, until you have reached the desired depth. By studying the drawing you will notice that this line should be cut back at an angle to receive the small piece of rattan which holds the mirror in position.
After you have cut the opening the required depth and shape to receive the mirror, saw out the other curves with a compass or coping saw. You should be careful to have the edges perfectly square. As all of these edges are to be rounded, the first operation would be to chamfer them equally all the way round. To do this, gauge on all surfaces and all edges, using the pencil and finger (Chapter II., Paragraph 8). This chamfering can be most satisfactorily done with a sharp sloyd knife or pocket knife. This whittling, however, must be done with great care, or you will split out beyond the gauge line and mar your work. After the chamfering has been completed, you should go entirely around the work again, cutting away the remaining corners of the chamfer. This causes the edge to approach the rounded shape. After as much work has been done with the pocket knife as convenient, the wood file should be used to complete the rounding. Ail edges should be made perfectly round and smooth. This portion of the work cannot be hurried and must be carefully completed, after which all edges should be sandpapered. The plan used in sandpapering a cylinder (Chapter II., Paragraph 15) could be successfully used. All tool marks, rough places and irregularities must be removed.
Continue to:
My Books

