How to Make a Gilding. The Junk Pile
Description
This section is from the book "Make It And Make It Pay!", by Catherine Roberts. Also available from Amazon: Make It And Make It Pay.
How to Make a Gilding. The Junk Pile
EVERY home has an accumulation of bottles, cardboard and wood containers, jugs and tin containers of various kinds that are waiting for the trash collector or the junk man to take away. Many of them are being kept simply because they "are too good to throw away." Others are being saved because "someday I'll find a use for them." In the meantime, they lie there waiting for you to discover the money making possibilities they hold.
Take bottles and jugs, for instance. Painted with gay, bright designs they make charming gifts. When well executed, they are easily sold at church and charity bazaars and, in many localities, may be sold to gift shops. Used as lamp bases, cruets, ivy holders, bath salts and cologne bottles, the hand painted glass container has a double appeal. They are fun for the craftsman to make and fun for the customer to own.
The tools needed for digging wealth from the junk pile are: two brushes: a 1/4" lettering brush and a pointed sable hair brush, size 0 enamel paint in an assortment of colors clear lacquer paint rags turpentine etching paste and foils masking or scotch tape a 2" brush for covering large areas before decorating lettering stencils
A ginger ale bottle is just about perfect for a beginner to start with. It has a pleasant shape, a good color and a perfectly smooth surface. Other styles and shapes of bottles may be effectively used, providing they have simple flowing lines and no designs or lettering embossed or pressed on the surface. When the size of the bottle is stamped on the glass it is usually close to the bottom and therefore can be overlooked. This is the only exception to the rule of working on a perfectly smooth surface.
All labels must be removed and the bottle thoroughly cleansed before any painting is begun. Wash each bottle in hot soapy water to which you have added a tablespoon or two of washing soda. If the label refuses to come off, let the bottle soak over night. Rinse off all the soap and then rub your fingers over the glass to see that no glue still adheres to it. A gentle rubbing with steel wool will remove stubborn glue. Rinse again in hot water, then polish the bottle with a clean towel.
While artist's oil paint and poster paint may be used for this kind of decoration, the most satisfactory paint is automobile or house enamel. It dries with a high gloss and a hard finish which contributes to the professional appearance of the finished work. Buy only the smallest size cans and start off with six bright colors: red, blue, green, yellow, white and black. Only two brushes are needed in the beginning: a flat lettering brush, quarter inch size, and a pointed sable brush, size 0. With these two brushes all strokes may be made easily and quickly.
The practice strokes you'll want to try may be done on paper. Working first with one brush and then the other, try short wavy lines, curves of various lengths and thickness, dots, dashes, semicolons and question marks, apostrophes and plus signs. It will only take a few strokes to show you that the sharp, clean outline of the stroke comes when it is swiftly and surely done. Now, try combining these various punctuation marks. By setting a reversed question mark beside a regular one, you have produced either a leaf shape or a heart, depending upon how fat you made the curves. Pairs of apostrophes, separated with either periods or angular dashes, make a good looking border. Try other combinations and reversals. In a matter of moments you'll see how very easy it is not only to paint but to paint designs with a few basic strokes.
After the paper practice, try the strokes and designs on a bottle. To avoid spoiling the bottle, cut a. sheet of paper wide and long enough to fit around the bottle. Scotch tape it on, then practice the brush strokes on the paper covering. The curved surface will seem a little difficult to work on at first but that strangeness will wear off after a while. Soon you will be painting with the fast, sure strokes of a professional.
The enamel should be flowed rather than brushed on. Dip the brush into the enamel and then allow the surplus to drip off. With a gentle stroke, rub the bristles against the top edge of the can to take off the hidden surplus. Too full a brush will result in enamel flowing all over the glass. Within a short time you will get the knack of how much paint to leave on the brush and how far a stroke will go before redipping is necessary. Mistakes or sloppy execution should be corrected immediately by wiping off the paint with a turpentine soaked rag. Do not paint over or try to retouch an unsatisfastory stroke. That usually results in clumsiness, the sign of an amateur.
In the beginning, do not try to use more than one color at a time when painting with enamels. Each color must dry thoroughly before the next one is used, otherwise smearing and running will occur. Be safe and allow each color to dry overnight. Later on, as your skill in managing the brush increases, it will be possible to work with two or three colors at one sitting. This is done by stopping the stroke of one color just before it touches a second color. To do it successfully requires delicate handling and complete control of the brush. It is worth learning because it speeds up the work enormously.
Keep the brushes clean by washing them in turpentine and wiping them off on rags after each session. A dirty brush gives a muddy color, thus spoiling the fresh, bright effect that is a large part of the appeal of this kind of work. As you progress, you will want to get a separate brush for each color. This also speeds up the work and then the cleaning process can be put off until the end of the job rather than taking time out between colors for individual cleaning.
Naturally, every craftsman wants to develop his own particular style of decoration. By studying the characteristic designs of various nationalities, experimenting with them and introducing your own interpretations, you will begin to develop an individual style. Museums and libraries offer a wealth of material, if you'll ask for it. Notice how easily distinguishable Austrian design is from Russian work. Make rough sketches of distinctive motifs together with notes about the colors used. Then look at some Pennsylvania Dutch stuff and compare it with Swedish and German decorations. Make more notes and rough sketches.
A highly personal style is the ultimate goal of every craftsman. To emphasize individuality further, adopt a similiar device to that which makes Hunt-decorated things so easily recognized. Include a symbol, legend or monogram in every design. Peter Hunt, one of America's best known craftsmen in the decorative field, always uses the extremely effective device of dating his work. Borrowed from ancient craftsmen, practically every Hunt piece bears the legend "Anno Domine, 1948", or whatever the year may be. Your method of identification might be some small symbol such as a shell or a tiny turtle that is always worked into the design someplace. This amounts to signing your work, always a desirable thing especially when you wish a professional career in the craft.
Key to styles, colors and techniques is found by studying the designs of foreign countries and local antique crafts.

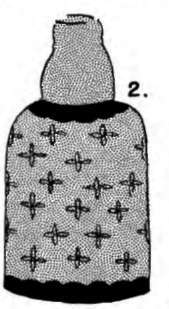
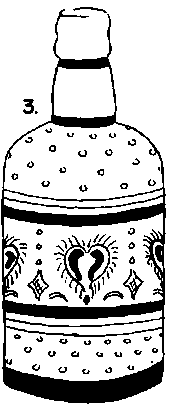

1. Swedish
2. French
3. Pennsylvania Dutch
4. Austrian.
Decorative designs for painting any kind of containers fall into three groups: stripes and geometries, florals and freehand figures, and a combination of these two styles. Stripes and geometric motifs must have sharp, clean edges and be accurately spaced. The professional way of doing this is by taping the bottle with scotch or masking tape before the stripes or designs are painted on. The plan of the stripes should be worked out in advance. If the bottle measures 9" around and quarter inch stripes are to be run up and down the bottle, you will have eighteen stripes of color, alternated with eighteen stripes of clear glass.
Continue to:
My Books

