


Chapter 9. Projects For The Bedroom
Description
This section is from the book "Do It Yourself With Aluminum. 125 Projects For The Home Craftsman", by G. W. Birdsall. Also available from Amazon: Do It Yourself With Aluminum.
Chapter 9. Projects For The Bedroom
Rods for Clothes Closet (Fig. 9-1) are made from 11/4" tube cut to exact distance from wall to wall minus 1/4" for clearance. Two 1" thick wood blocks, 4" square and screwed to wall, support the tube. Cut11/2" diameter hole in one block and 11/2" U-shaped opening in the other to permit insertion and removal of the rod (see Fig. 4-78). Be sure to locate blocks over studs in the wall.
Fig. 9-1.

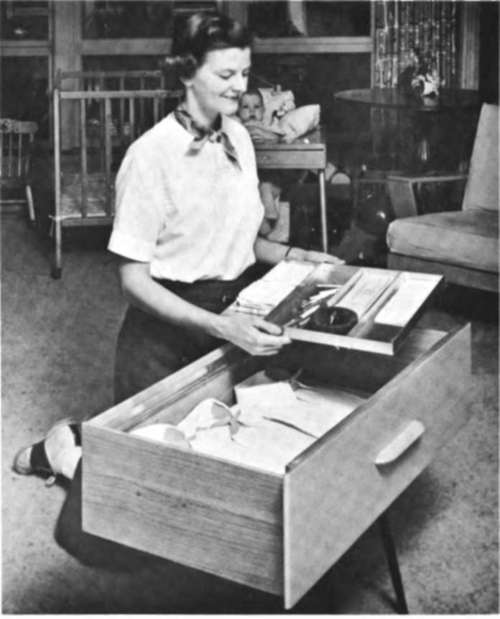
Fig. 9-2.
Sliding Tray for Drawer (Fig. 9-2) utilizes space ordinarily wasted in top of drawers in chests and dressing tables. The metal tray is 1" deep and quickly slides out of the way or lifts free from angle slides.
To make tray, cut a piece of sheet 12" wide and length determined as follows: Measure depth of drawer (from inside front to inside back). Add 2" for each partition desired; add another 3" for making the ends; subtract 1/4" to provide sliding clearance.
Mark location of partitions, and make 180° bends at those points by clamping and bending as in Fig. 9-3. Change clamps, and make the 90° bends as in Fig. 9-4. Form the ends by bending a fold first and then making the 90° bend. With tray forming completed, assemble it to 1/16" x 1" x 1" angle by riveting (Fig. 9-5). These sides are cut the same length as the distance from inside front to inside back of drawer minus 1/4" for clearance.
To make slides for the tray, cut two pieces of 1/16" x 1" x 1" angle the same length as width of drawer. Saw one leg off so that it is only 3/8" wide instead of 1", and mount against inside of drawer front about 2" below top edge of drawer sides as shown in Fig. 9-2. Attach other slide against inside of drawer back, 2" down also. Countersink and mount with screw-heads flush as detailed in Fig. 9-6.


Vanity Table (Fig. 9-7) has frame made from 1/8" x 3/4" x 3/4" angle with flat surfaces of 3/4" plywood. The angle-to-angle joints are all riveted except where the upper end of the back leg is bent forward (see Fig. 4-39) to form a support for the top shelf. Or a separate piece of angle may be turned over and riveted to the back leg to support the top shelf similar to Fig. 4-74. Countersink wood screws flush with angle surface.
The only trick here is to saw a 3/16" wide slot in each end of the box section to take the front leg as it comes up past the box. Don't make this cut until you have assembled the frame, fitted the box into it, and marked the cut directly from the frame itself. See Figs. 4-53 and 4-54 for details. Dimensions are on Fig. 9-8.
The simplicity of this design is its high point. Back panel of box provides lengthwise rigidity. End panels provide front-to-back rigidity.
Sewing Table (Fig. 9-9) uses a flush door measuring 21/2' x 6' for the top. Shelves are 3/4" plywood cut 15" x 24". Legs and stretchers are x 3/4" x 3/4" angle. Diagonal reinforcing members are 1/8" x 3/4" bar riveted to the leg angles as shown.
Cut legs 291/2" long to allow 3/4" top and bottom for cutting away 3/4" of one face to make flat (see Fig. 4-49) to prevent digging into the floor at the bottom and for connecting top end to underside of table as in Fig. 4-47.
Attach shelves to legs with screws through legs. Before running these screws up tight, cut and rivet the cross braces to the legs. Put a rivet through the braces where they cross each other. These braces provide the rigid frame structure required. A plywood panel (as thin as 1/4") may also be used in place of the cross braces to stiffen the structure.
Next, turn table top upside down and attach legs. Now rivet the top front stretcher and the lower rear stretcher in place. These, with the stretcher and cross brace between the right-hand legs, make the framework of the desk completely rigid. A plywood panel may be substituted for the brace and stretcher between the right-hand legs if desired.

Where additional shelf space is wanted, add another pair of shelves at the right-hand end of the desk. These shelves can easily be converted to cupboard or storage units merely by adding a door and enclosing sides and back. If sliding drawers are desired instead of shelves, attach drawer slides made from the angle and riveted to the legs inside the corners as detailed in Fig. 4-52.
Earring Storage (Fig. 9-11) is easy to build into any shallow drawer .... or to mount in top part of a deeper drawer, like the unit shown in Figs. 9-2 and 9-6. The earrings are hung on vertical divider sections.

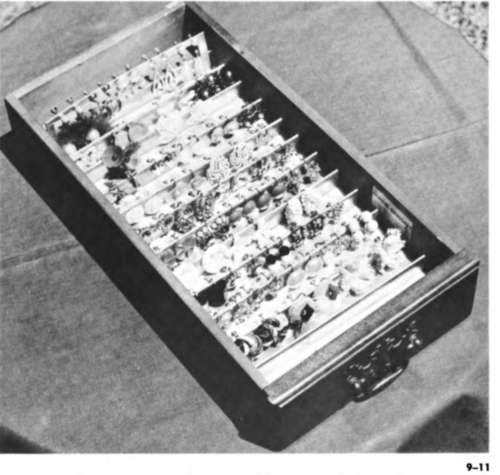
Cut a sheet of plain aluminum as wide as the drawer and the same length as the drawer plus 2" for each vertical element to be used with button type earrings and
4" for each one used with pendant type earrings. Then bend the sheet as shown in Figs. 9-3 and 9-4 to make the same type structure shown in Fig. 9-5. This produces a 1" high vertical element for button earrings, and 2" high elements for pendant. Arrange the work so the 2" high elements come at back of drawer.

Fig. 10-1.
Continue to:


My Books

