All-Balsa Plane Model. The Minute Man
Description
This section is from the book "Boy's Fun Book Of Things To Make And Do", by Grosset & Dunlap Publishers. Also see: The Pocket Dangerous Book for Boys: Things to Do.
All-Balsa Plane Model. The Minute Man
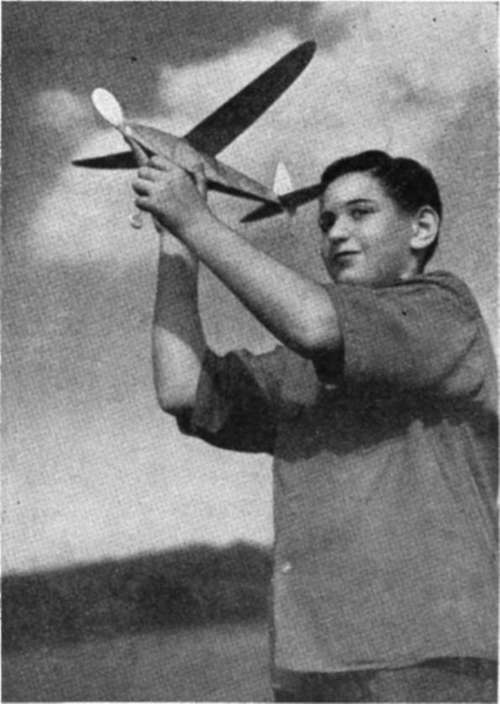
THIS little plane, capable of flights of over 2,000 feet, can be built and launched in less time than is usually required to construct the fuselage of more complicated models. Its sturdy, simple design is an instructive example of what can be done with lightweight and quarter-grained (otherwise known as "C" cut) balsa sheets.
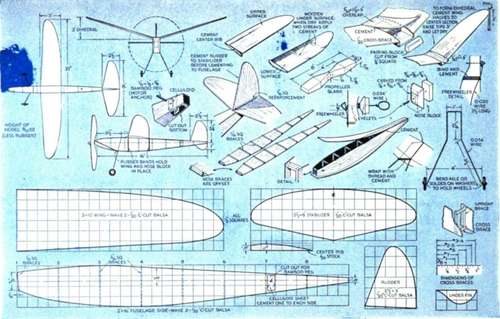
In selecting the balsa, see that it is light and shows the speckled surface which identifies "C" grain. Cut the fuselage and wing parts cleanly with a sharp blade to produce smooth edges. The dimensions of the fuselage cross braces should be taken from the numbered scale which appears in the drawings. Notice, in the detail of the nose, how the eight braces are offset for maximum strength. Spread cement carefully along the full length of the edges when assembling the fuselage. The top and bottom sheets are trimmed flush with the sides after the cement has hardened.
The wing camber is obtained by moistening the under surface with water, and allowing the single end rib to extend the camber along each wing. The sheet may at first tend to curve upward, but will assume the proper downward curve as it dries. When it is quite dry, apply broad streaks of cement to the underside, as shown in the drawings. These are important.
Cut the propeller blank from a straight-grained block of balsa, 7/8" by 11/8" by 8".
All materials for this trim little ship cost less than half a dollar.
Because no model plane is better than its propeller, the builder is urged to read the instructions given in the article following this one.
The freewheeling device shown in the plans operates in this way: The long hook is so fastened to the propeller that it normally springs out of contact with the triangular hook on the motor shaft. After the rubber is wound, the hooks are engaged by hand. When the motor has been exhausted in flight, the propeller overruns the shaft, and the long hook springs free, permitting the propeller to turn upon the shaft. It is important that there be no friction between propeller and shaft once the hooks are disengaged. A drag at this point may cause the propeller to act as a rudder during the glide, spoiling the model's performance. In the case of a small ship such as this, a dragging propeller may even cause it to spin down in a spiral dive when the rubber is exhausted.
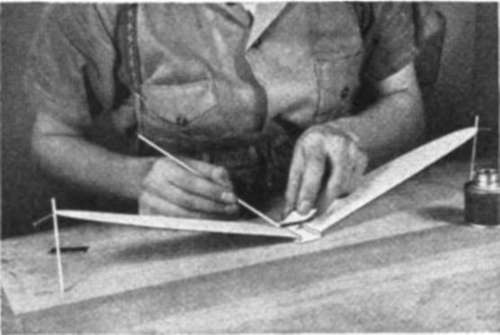
Form the dihedral angle by elevating wing tips three inches above the center, and cement on the overlapping strip and fairing block.
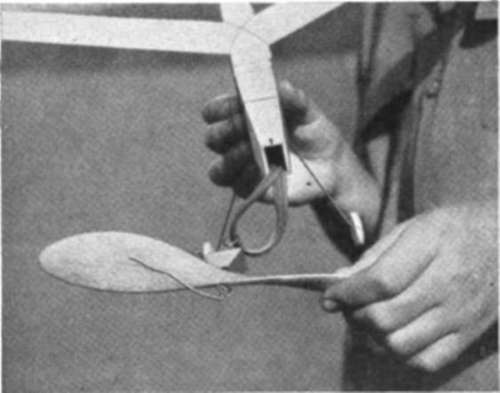
Propeller, detachable nose block, "freewheeler," and rubber motor. The hook on the propeller engages the shaft while motor is under tension, springing free when the energy of the rubber is exhausted.
List Of Materials
2 pc. "C" cut balsa 1/32" by 2" by 36" for fueslage
1 ;pc. "C" cut balsa 1/20" by 3" by 36" for wing and tail
2 ;pc. hard ;balsa 1/16" square by 36" for fuselage braces
1 pc. balsa ;7/8" by 11/8" by 8" for propeller
1 pc. balsa 1/4" by 1" by 2" for nose block and fairing block
1 pc. 0.034" piano wire, 24" long, for landing gear 1 pc. 0.020" piano wire, 3" long, for freewheeler
8' rubber strand, 1/8" flat (brown); 1 pair hardwood wheels. 1" diameter; 4 washers. 3/16"; 2 shaft bushings, 1/2" long; cement, celluloid, bamboo, rubber bands.
Estimated cost: about 35 cents.
The motor consists of six strands of 1/8" flat rubber. Form it by winding the rubber over two nails placed 15" apart. Wet the ends, and tie with several knots. Lubricate the motor with glycerin before pulling it through the fuselage.
The nose block is made of two parts cemented together, its upper face being grooved for the rubber band which holds it to the fuselage. An eyelet is used for the shaft bearing. The fuselage shape shown will give the nose block an offset or down thrust of 1/16". After test flights have been made, or when the motor is to be wound up for maximum duration (700 turns), the nose block should be given about 1/16" right thrust. Only experiment will determine exactly the correct amount.
Before flying it under power, test the model's glide. Move the wing back if the ship stalls, or forward if it tends to dive. The rudder may be warped if a circular flight is desired. After a smooth, flat glide is obtained, make a test flight with the motor partly wound, and correct the wing setting if necessary. Once the adjustments have been made, the ship should readily make flights of more than a minute's duration in calm air.
Simplicity and sturdiness are the keynotes of this all-balsa design. Study the; plans before starting work
Continue to:
My Books

